Access Filmora's Color Adjustment Tools
Adjusting the color of your video clips in Filmora for Mobile is seamless and can be done through the app's Work Area. However, you'll first have to open an existing project or create a new one.
1. Expand the Project Management panel from Filmora's startup screen and tap on an existing video editing project to open it.
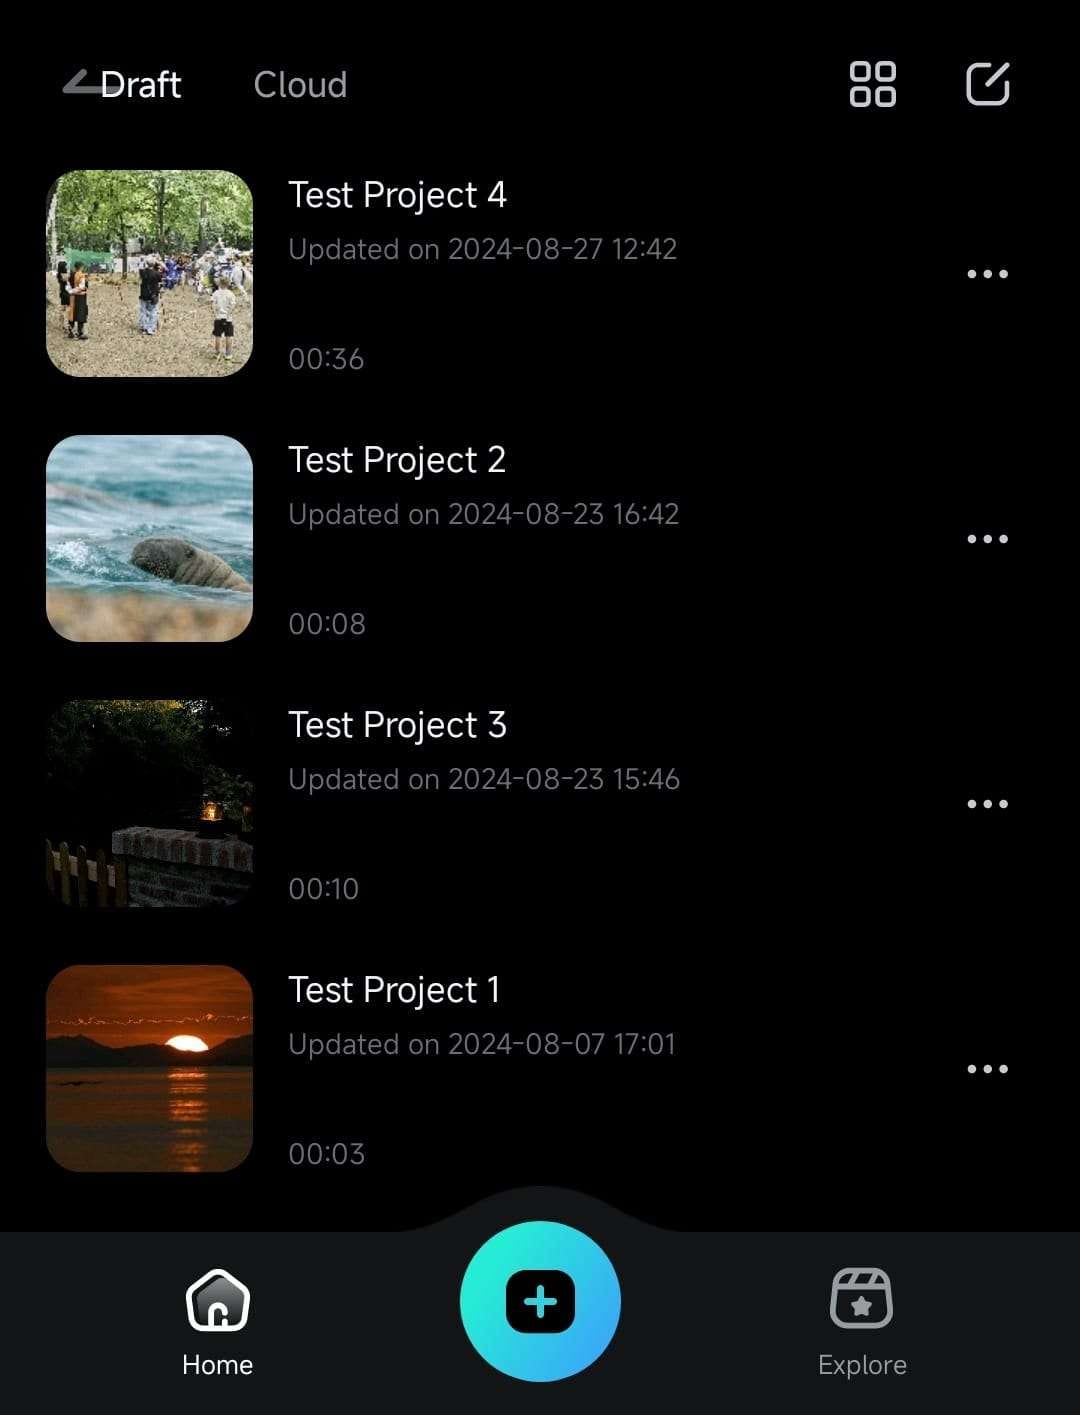
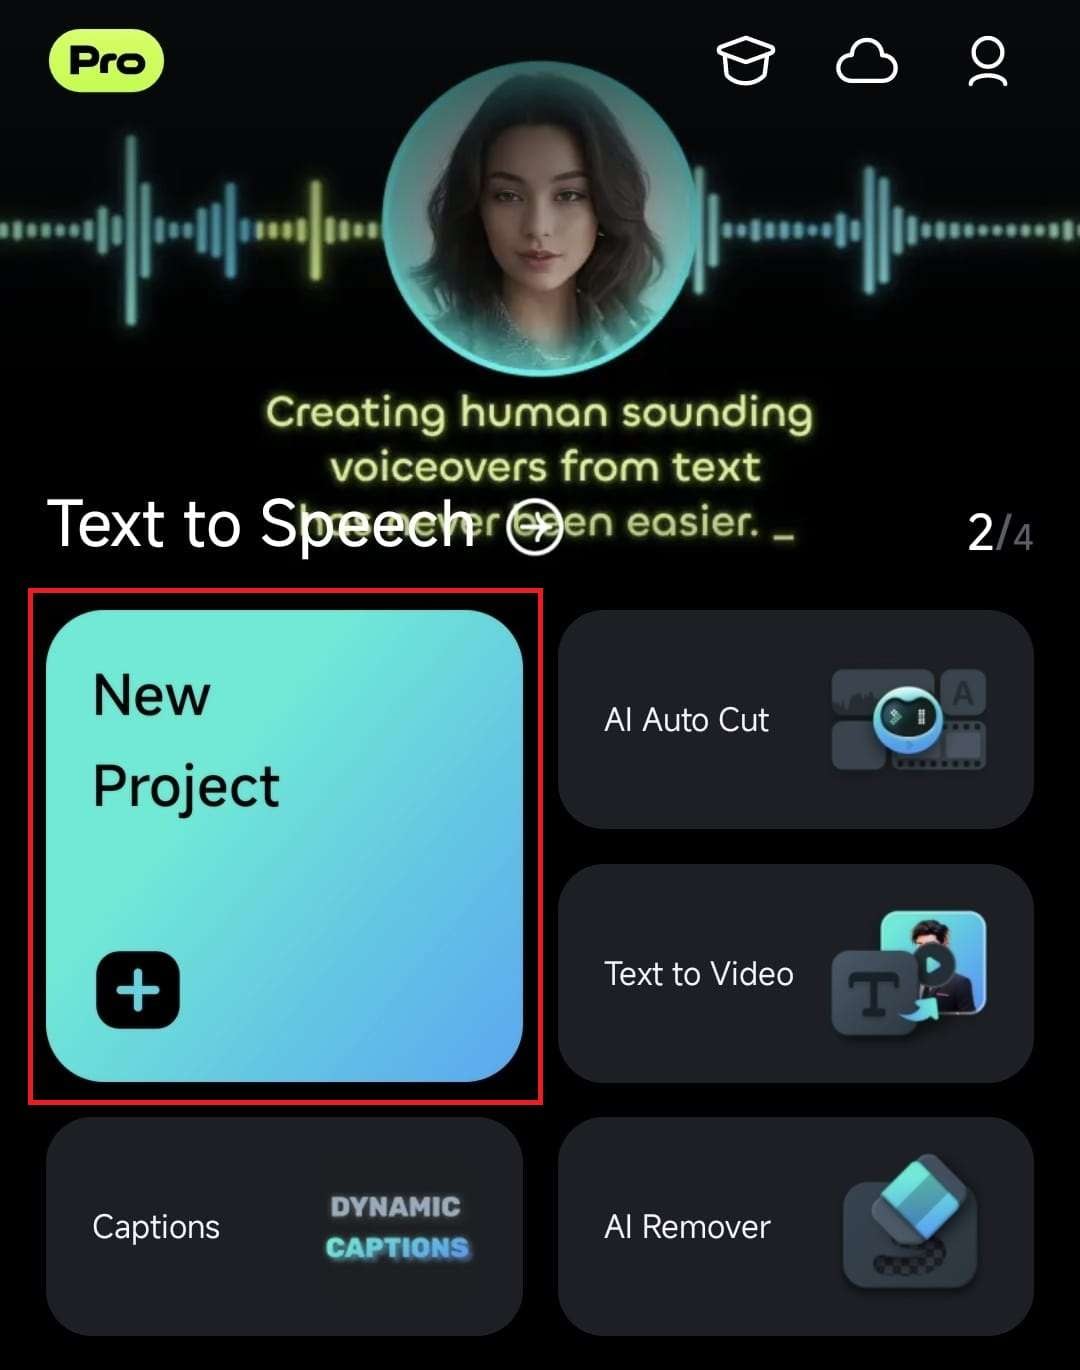
2. Alternatively, hit the New Project button in the Quick Access panel on the startup screen to start from scratch.
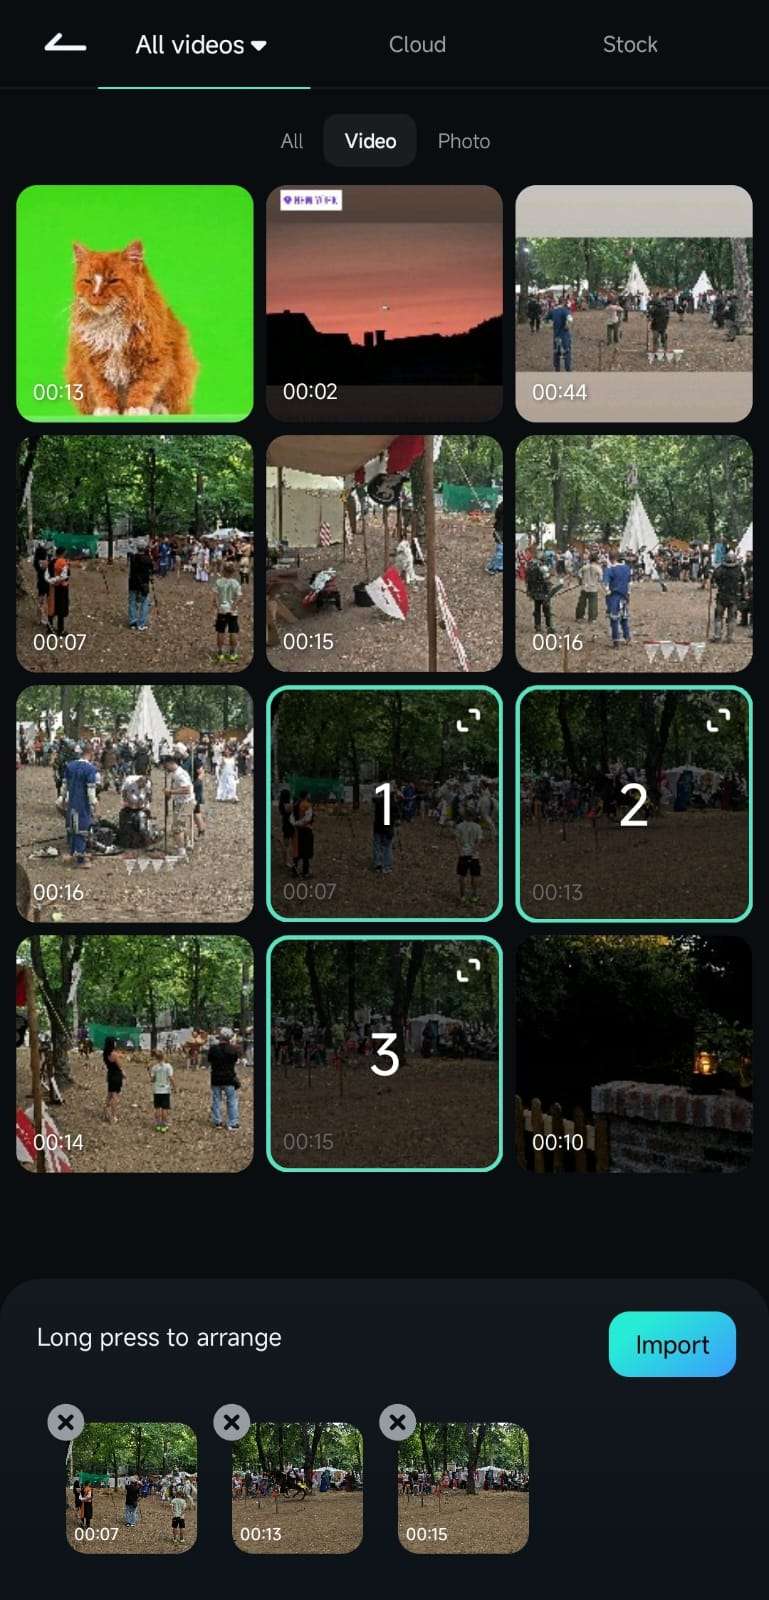
3. Then, add your video clips by selecting them and pressing the Import button in the bottom right corner.
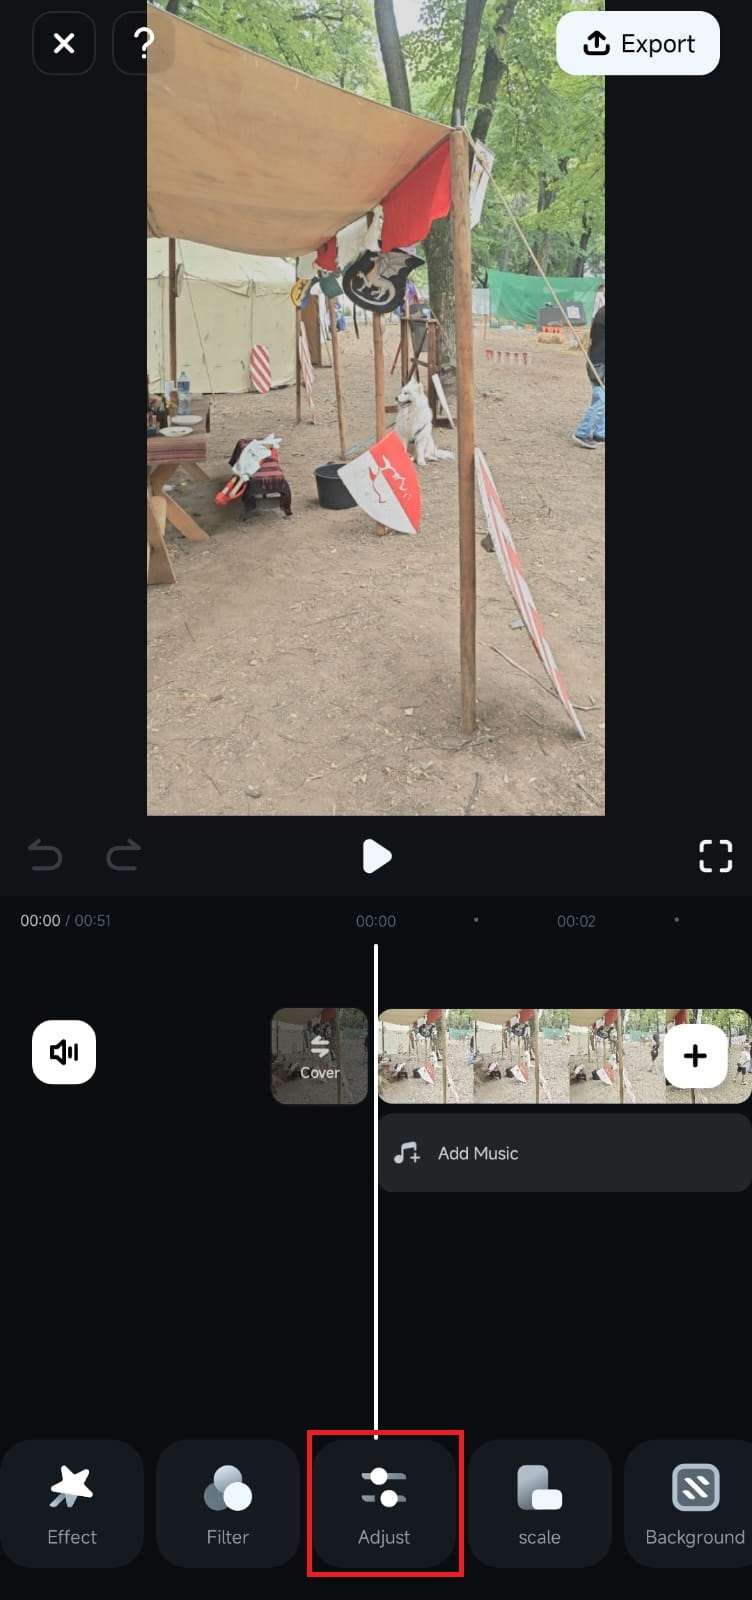
4. Once inside the mobile editing app's Work Area, scroll the Toolbar at the bottom until you find the Adjust button. Then, click on it to access Filmora's color adjustment tools.
Enhance Your Video's Visuals with Color Adjustments
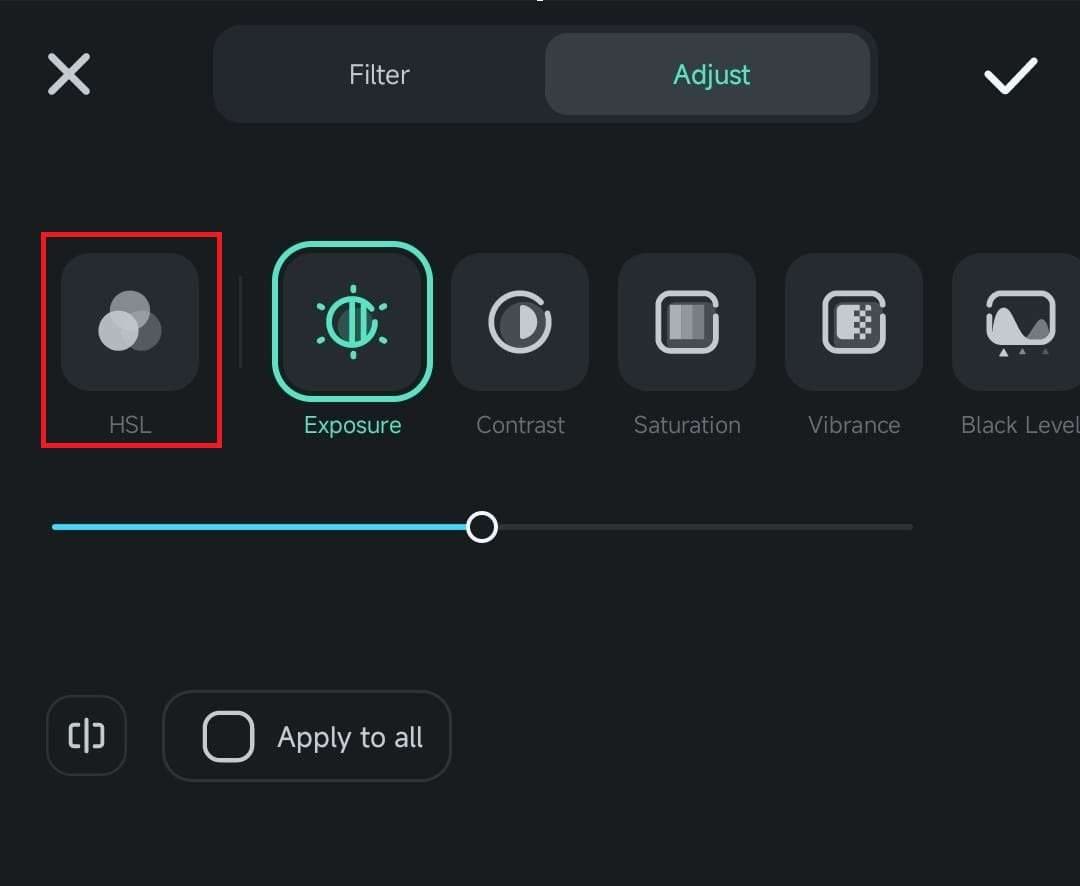
The Adjust menu in Filmora's Work Area holds all color adjustment tools. It consists of multiple options, such as Exposure, Contrast, Vibrance, etc., simple sliders for each adjustment, and the HSL tool.
1. To adjust the fundamental color settings of your clip, hit the HSL option.
2. Move the Hue, Saturation, and Brightness sliders for each of the eight colors.
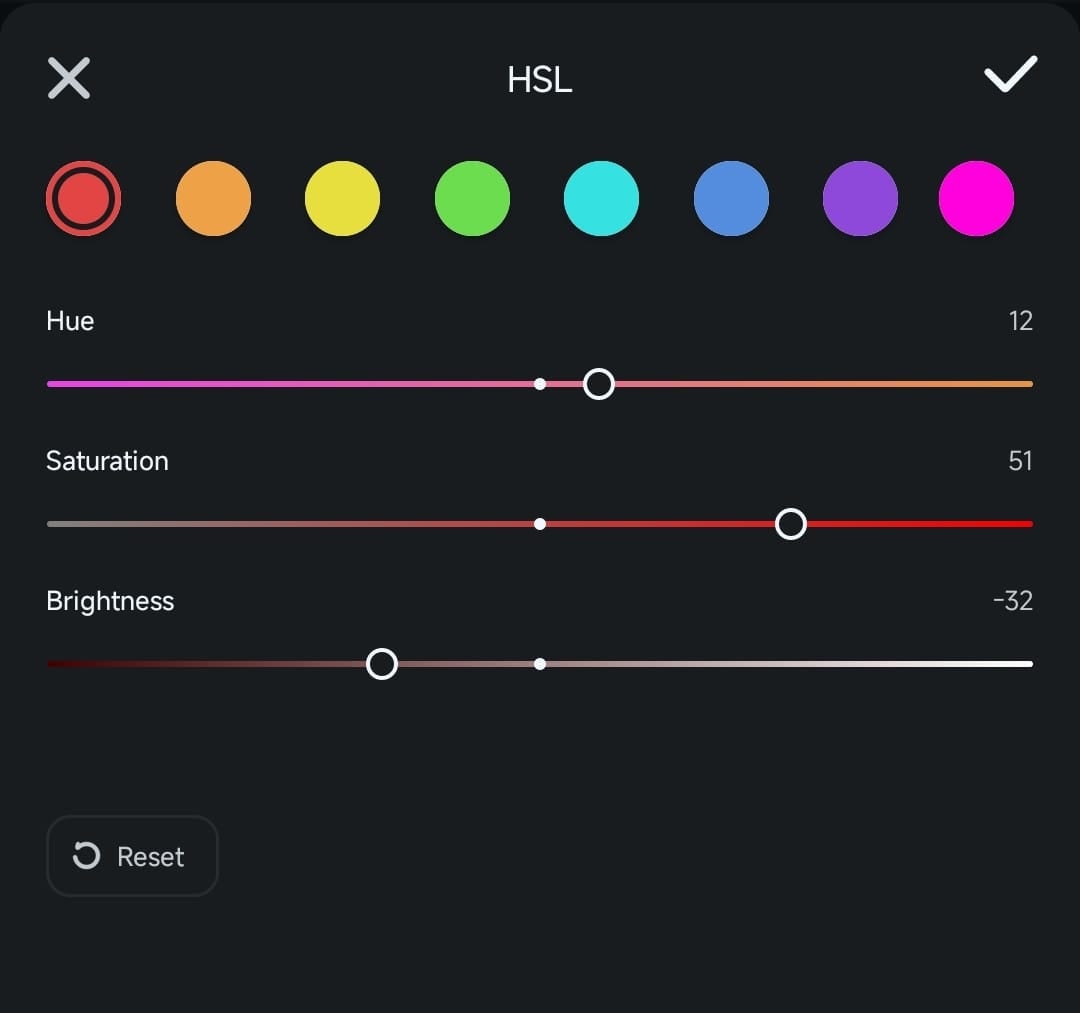
3. Tap the X icon to exit the HSL tool and play with other color options in the Adjust menu. You can change the Brightness, Shadow, Tone, and other color aspects by selecting the tool and dragging the slider underneath it.
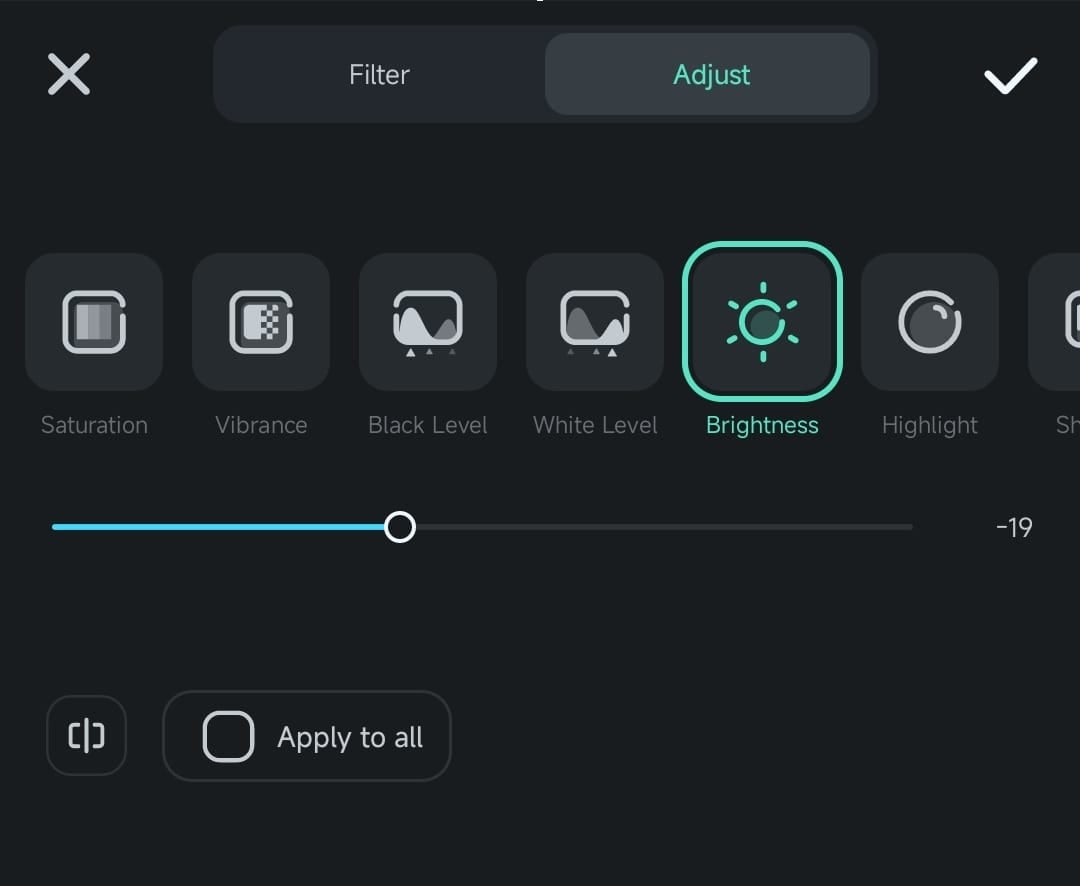
Note: Ticking the box next to the Apply to all option in the Adjust menu will apply color adjustments to all your video clips simultaneously, making it effortless to maintain a consistent color profile throughout your video editing project.
Was This Helpful?
Thanks for your feedback.
Can you tell us what didn't work for you?
Email address is optional. Leave it blank if you do not need follow-up.
Feedback sent!